MIC7000 Illuminator - Armanica · MIC7000 Illuminator MIC-ILx-100 Quick Installation Guide english...
15
MIC7000 Illuminator MIC-ILx-100 Quick Installation Guide english deutsch français 中国语文 CHS español dansk suomi italiano 日本語 nederlands norsk polski portuguese русский svensk
Transcript of MIC7000 Illuminator - Armanica · MIC7000 Illuminator MIC-ILx-100 Quick Installation Guide english...
MIC7000 IlluminatorMIC-ILx-100
Quick Installation Guide english
deutschfrançais中国语文 CHSespañoldansk
suomiitaliano日本語nederlandsnorskpolskiportugueseрусскийsvensk


english Table of contents 5
deutsch Inhaltsverzeichnis 16
français Table des matières 27
中国语文CHS
目录 38
español Tabla de contenidos 49
dansk Indholdsfortegnelse 60
suomi Sisällysluettelo 71
italiano Sommario 82
日本語 目次 93
nederlands Inhoudsopgave 104
norsk Innholdsfortegnelse 115
MIC7000 Illuminator | 3
Bosch Security Systems 2014.08 | 1.2 | F.01U.306.503

polski Spis treści 126
portuguese Índice 137
русский Содержание 148
svensk Innehållsförteckning 159
4 | MIC7000 Illuminator
2014.08 | 1.2 | F.01U.306.503 Bosch Security Systems
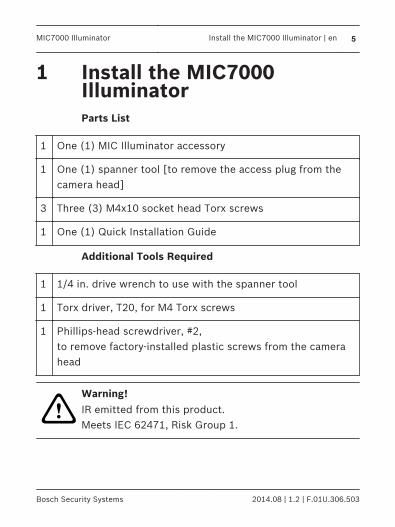
Install the MIC7000IlluminatorParts List
1 One (1) MIC Illuminator accessory
1 One (1) spanner tool [to remove the access plug from thecamera head]
3 Three (3) M4x10 socket head Torx screws
1 One (1) Quick Installation Guide
Additional Tools Required
1 1/4 in. drive wrench to use with the spanner tool
1 Torx driver, T20, for M4 Torx screws
1 Phillips-head screwdriver, #2, to remove factory-installed plastic screws from the camerahead
!
Warning!IR emitted from this product.Meets IEC 62471, Risk Group 1.
1
MIC7000 Illuminator Install the MIC7000 Illuminator | en 5
Bosch Security Systems 2014.08 | 1.2 | F.01U.306.503
Notice!This product has been tested according to standardIEC62471:2006 “Photobiological safety of lamps andlamp systems”. The product emissions exceed theEXEMPT Group limit for both Retinal Blue Light andCornea/Lens infrared hazard as defined by IEC62471:2006. The product was found to meet the RiskGroup 1 exposure limits for IR and White LEDs.
Refer to the MIC7000 Operation Manual for completeinformation on illumination safety.
Notice!If the MIC camera will have both illuminator andsunshield accessories, install the illuminator first.Extreme low temperature MIC7000 models do notsupport the illuminator.
1. Mount the camera or stand it temporarily in thepackaging foam on a stable surface before proceeding.(Refer to the Operation Manual.)Note: If the camera will be mounted inverted, you mustrotate the tilt head before attaching the illuminator.Apply power and connect to your network as illustratedin the figure below.
6 en | Install the MIC7000 Illuminator MIC7000 Illuminator
2014.08 | 1.2 | F.01U.306.503 Bosch Security Systems
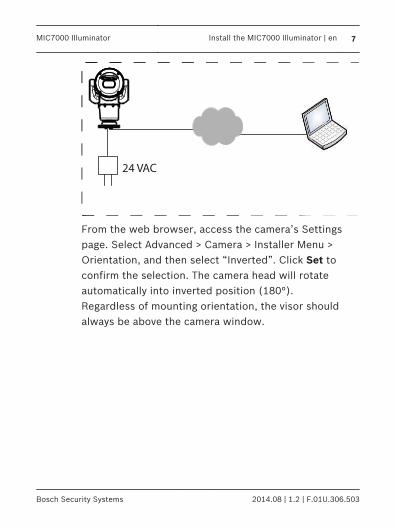
24 VAC
From the web browser, access the camera’s Settingspage. Select Advanced > Camera > Installer Menu >Orientation, and then select “Inverted”. Click Set toconfirm the selection. The camera head will rotateautomatically into inverted position (180°).Regardless of mounting orientation, the visor shouldalways be above the camera window.
MIC7000 Illuminator Install the MIC7000 Illuminator | en 7
Bosch Security Systems 2014.08 | 1.2 | F.01U.306.503
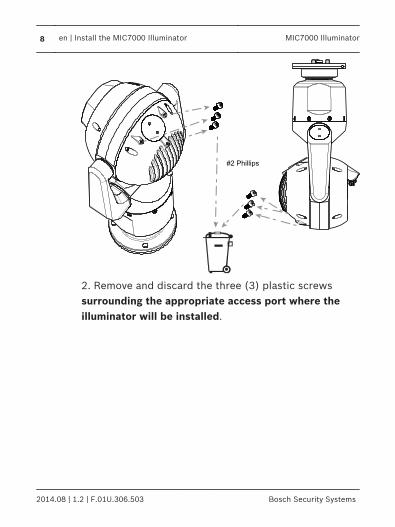
#2 Phillips
2. Remove and discard the three (3) plastic screwssurrounding the appropriate access port where theilluminator will be installed.
8 en | Install the MIC7000 Illuminator MIC7000 Illuminator
2014.08 | 1.2 | F.01U.306.503 Bosch Security Systems
1/4”
1/4”
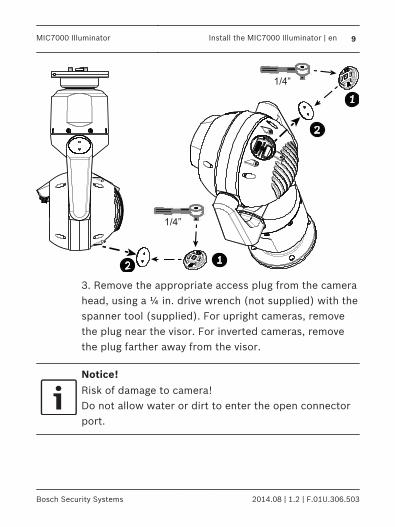
3. Remove the appropriate access plug from the camerahead, using a ¼ in. drive wrench (not supplied) with thespanner tool (supplied). For upright cameras, removethe plug near the visor. For inverted cameras, removethe plug farther away from the visor.
Notice!Risk of damage to camera!Do not allow water or dirt to enter the open connectorport.
MIC7000 Illuminator Install the MIC7000 Illuminator | en 9
Bosch Security Systems 2014.08 | 1.2 | F.01U.306.503

Bosch suggests storing the access plug and spannertool inside the DCA mount (or wall mount accessory) incase it becomes necessary to remove the illuminator.
4. Remove the plastic cap from the illuminatoraccessory. Discard.
10 en | Install the MIC7000 Illuminator MIC7000 Illuminator
2014.08 | 1.2 | F.01U.306.503 Bosch Security Systems

Notice!Do not disturb the O-ring as you slide off the cap.
5. Align the illuminator over the access port andcarefully push into position on the camera head.
MIC7000 Illuminator Install the MIC7000 Illuminator | en 11
Bosch Security Systems 2014.08 | 1.2 | F.01U.306.503
1.4 N m
(≈ 12 in. lb)
T20 Torx
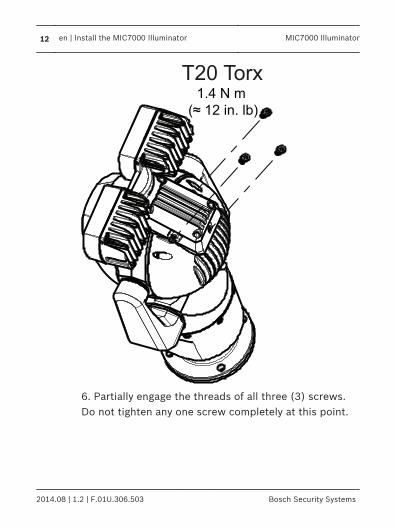
6. Partially engage the threads of all three (3) screws.Do not tighten any one screw completely at this point.
12 en | Install the MIC7000 Illuminator MIC7000 Illuminator
2014.08 | 1.2 | F.01U.306.503 Bosch Security Systems
Notice!If you are also planning to install the MIC sunshield,insert only the rear center screw to hold the illuminatoraccessory in position until you install the sunshield.
Tighten the screw on one side by two (2) turns. Tightenthe screw on the other side by two (2) turns. Tightenthe center screw by two (2) turns. Repeat until allscrews are tight.
!
Warning!Total engagement is not complete until you tighten allthree (3) screws.
MIC7000 Illuminator Install the MIC7000 Illuminator | en 13
Bosch Security Systems 2014.08 | 1.2 | F.01U.306.503
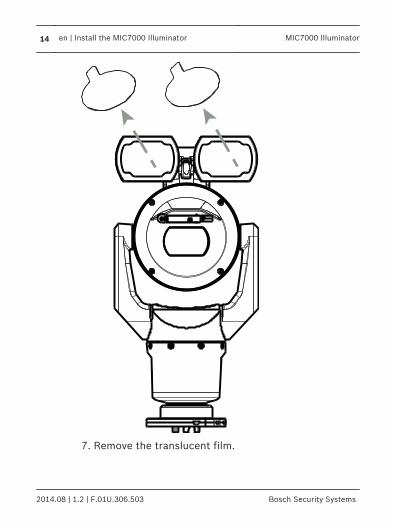
7. Remove the translucent film.
14 en | Install the MIC7000 Illuminator MIC7000 Illuminator
2014.08 | 1.2 | F.01U.306.503 Bosch Security Systems
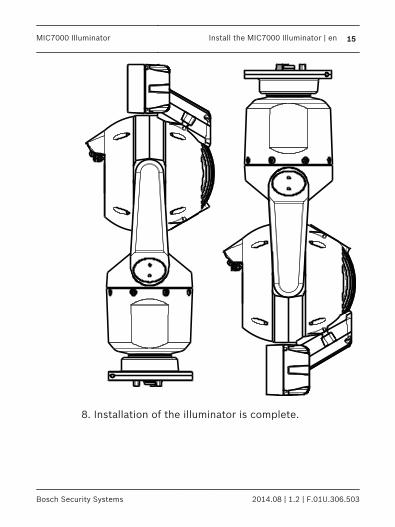
8. Installation of the illuminator is complete.
MIC7000 Illuminator Install the MIC7000 Illuminator | en 15
Bosch Security Systems 2014.08 | 1.2 | F.01U.306.503