Zigbee - s.bega.com · ZigBee control module 030 ZigBee control module 031 ZigBee control module...
20
Zigbee Gateway 70 588 · Quick Start Guide
Transcript of Zigbee - s.bega.com · ZigBee control module 030 ZigBee control module 031 ZigBee control module...
Zigbee
Gateway 70 588 · Quick Start Guide
Deutsch
A
B C D
E
F G
I
H
AB
CDEFGH
I
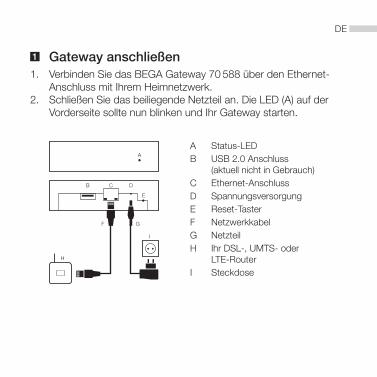
Status-LED USB 2.0 Anschluss (aktuell nicht in Gebrauch)Ethernet-AnschlussSpannungsversorgungReset-TasterNetzwerkkabelNetzteilIhr DSL-, UMTS- oder LTE-RouterSteckdose
1 Gateway anschließen1. Verbinden Sie das BEGA Gateway 70 588 über den Ethernet-
Anschluss mit Ihrem Heimnetzwerk. 2. Schließen Sie das beiliegende Netzteil an. Die LED (A) auf der
Vorderseite sollte nun blinken und Ihr Gateway starten.
DE

2 Gatewaykonfigurieren1. Öffnen Sie auf Ihrem PC, Smartphone oder Tablet ein
Browserfenster.2. Tippen Sie in die Adresszeile die IP-Adresse des Gateways im
Auslieferungszustand http://192.168.0.211 ein und drücken Sie die Returntaste.
3. Geben Sie im Anmeldefenster als Benutzername admin und als Passwort admin ein.
Achtung: Sollte sich nach Eingabe der IP-Adresse keine Seite öffnen, kann es sein, dass sich das Gateway in einem anderen IP-Adressbereich befindet. Die weitere Vorgehensweise hierfür erfahren Sie in der Inbetriebnahmeanleitung für das Gateway, Abschnitt „Netzwerkparameter für Gateway Zugriff ändern“.
3 NetzwerkkonfigurationSie befinden sich jetzt auf der Startseite der Gateway Web-Oberflä-che. Klicken Sie auf „Netzwerkkonfiguration“, um die Netzwerkein-stellungen an Ihr Heimnetzwerk anzupassen.
DE
TCP/IP TCP/IP
BEGA GatewayBEGA App
ZigB
ee control module 030
ZigB
ee control module 031
ZigB
ee control module 031
ZigB
ee
LN
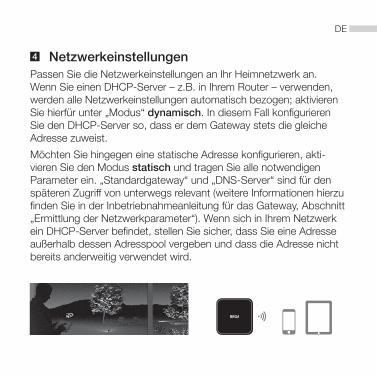
4 NetzwerkeinstellungenPassen Sie die Netzwerkeinstellungen an Ihr Heimnetzwerk an. Wenn Sie einen DHCP-Server – z.B. in Ihrem Router – verwenden, werden alle Netzwerkeinstellungen automatisch bezogen; aktivieren Sie hierfür unter „Modus“ dynamisch. In diesem Fall konfigurieren Sie den DHCP-Server so, dass er dem Gateway stets die gleiche Adresse zuweist.
Möchten Sie hingegen eine statische Adresse konfigurieren, akti-vieren Sie den Modus statisch und tragen Sie alle notwendigen Parameter ein. „Standardgateway“ und „DNS-Server“ sind für den späteren Zugriff von unterwegs relevant (weitere Informationen hierzu finden Sie in der Inbetriebnahmeanleitung für das Gateway, Abschnitt „Ermittlung der Netzwerkparameter“). Wenn sich in Ihrem Netzwerk ein DHCP-Server befindet, stellen Sie sicher, dass Sie eine Adresse außerhalb dessen Adresspool vergeben und dass die Adresse nicht bereits anderweitig verwendet wird.
DE
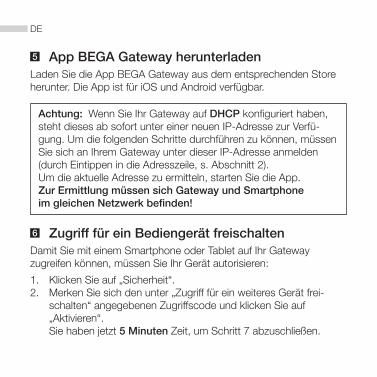
5 AppBEGAGatewayherunterladenLaden Sie die App BEGA Gateway aus dem entsprechenden Store herunter. Die App ist für iOS und Android verfügbar.
Achtung: Wenn Sie Ihr Gateway auf DHCP konfiguriert haben, steht dieses ab sofort unter einer neuen IP-Adresse zur Verfü-gung. Um die folgenden Schritte durchführen zu können, müssen Sie sich an Ihrem Gateway unter dieser IP-Adresse anmelden (durch Eintippen in die Adresszeile, s. Abschnitt 2).Um die aktuelle Adresse zu ermitteln, starten Sie die App. ZurErmittlungmüssensichGatewayundSmartphone imgleichenNetzwerkbefinden!
6 ZugrifffüreinBediengerätfreischaltenDamit Sie mit einem Smartphone oder Tablet auf Ihr Gateway zugreifen können, müssen Sie Ihr Gerät autorisieren:
1. Klicken Sie auf „Sicherheit“.2. Merken Sie sich den unter „Zugriff für ein weiteres Gerät frei-
schalten“ angegebenen Zugriffscode und klicken Sie auf „Aktivieren“. Sie haben jetzt 5Minuten Zeit, um Schritt 7 abzuschließen.
DE
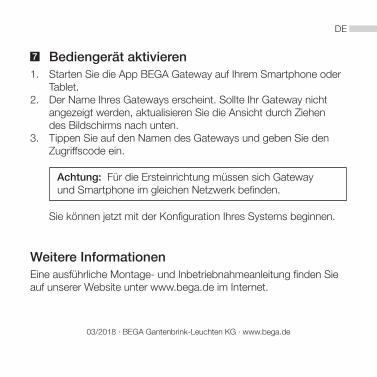
7 Bediengerätaktivieren1. Starten Sie die App BEGA Gateway auf Ihrem Smartphone oder
Tablet.2. Der Name Ihres Gateways erscheint. Sollte Ihr Gateway nicht
angezeigt werden, aktualisieren Sie die Ansicht durch Ziehen des Bildschirms nach unten.
3. Tippen Sie auf den Namen des Gateways und geben Sie den Zugriffscode ein.
Sie können jetzt mit der Konfiguration Ihres Systems beginnen.
WeitereInformationenEine ausführliche Montage- und Inbetriebnahmeanleitung finden Sie auf unserer Website unter www.bega.de im Internet.
Achtung: Für die Ersteinrichtung müssen sich Gateway und Smartphone im gleichen Netzwerk befinden.
03/2018 · BEGA Gantenbrink-Leuchten KG · www.bega.de
DE
English
A
B C D
E
F G
I
H
AB
CDEFGH
I
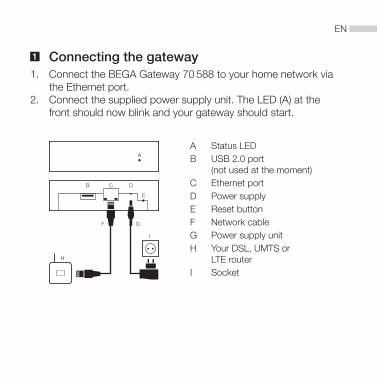
Status LED USB 2.0 port (not used at the moment)Ethernet portPower supplyReset buttonNetwork cablePower supply unitYour DSL, UMTS or LTE routerSocket
1 Connectingthegateway1. Connect the BEGA Gateway 70 588 to your home network via
the Ethernet port.2. Connect the supplied power supply unit. The LED (A) at the
front should now blink and your gateway should start.
EN
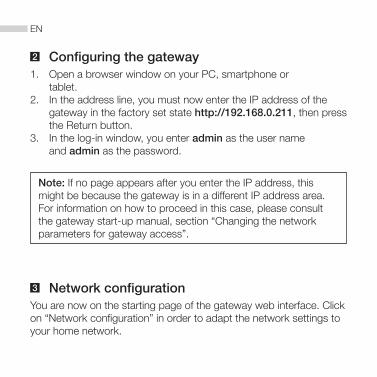
2 Configuringthegateway1. Open a browser window on your PC, smartphone or
tablet.2. In the address line, you must now enter the IP address of the
gateway in the factory set state http://192.168.0.211, then press the Return button.
3. In the log-in window, you enter admin as the user name and admin as the password.
Note: If no page appears after you enter the IP address, this might be because the gateway is in a different IP address area. For information on how to proceed in this case, please consult the gateway start-up manual, section “Changing the network parameters for gateway access”.
3 NetworkconfigurationYou are now on the starting page of the gateway web interface. Click on “Network configuration” in order to adapt the network settings to your home network.
EN
TCP/IP TCP/IP
BEGA GatewayBEGA App
ZigB
ee control module 030
ZigB
ee control module 031
ZigB
ee control module 031
ZigB
ee
LN
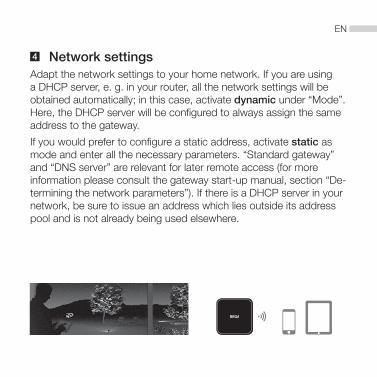
4 NetworksettingsAdapt the network settings to your home network. If you are using a DHCP server, e. g. in your router, all the network settings will be obtained automatically; in this case, activate dynamic under “Mode”. Here, the DHCP server will be configured to always assign the same address to the gateway.
If you would prefer to configure a static address, activate static as mode and enter all the necessary parameters. “Standard gateway” and “DNS server” are relevant for later remote access (for more information please consult the gateway start-up manual, section “De-termining the network parameters”). If there is a DHCP server in your network, be sure to issue an address which lies outside its address pool and is not already being used elsewhere.
EN
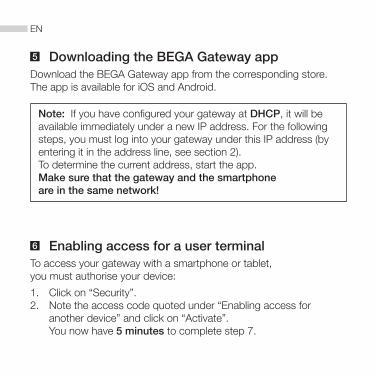
5 DownloadingtheBEGAGatewayappDownload the BEGA Gateway app from the corresponding store. The app is available for iOS and Android.
Note: If you have configured your gateway at DHCP, it will be available immediately under a new IP address. For the following steps, you must log into your gateway under this IP address (by entering it in the address line, see section 2).To determine the current address, start the app. Makesurethatthegatewayandthesmartphone areinthesamenetwork!
6 EnablingaccessforauserterminalTo access your gateway with a smartphone or tablet, you must authorise your device:
1. Click on “Security”.2. Note the access code quoted under “Enabling access for
another device” and click on “Activate”. You now have 5minutes to complete step 7.
EN
7 Activatingtheuserterminal1. Start the BEGA Gateway app on your smartphone or tablet.2. The name of your gateway will appear. If your gateway does not
appear, update the view by dragging the screen downwards.
3. Tap on the name of the gateway and enter the access code.
You can now begin with the configuration of your system.
MoreinformationA detailed installation and start-up manual can be found on the Inter-net at our website www.bega.com.
Note: For the initial set-up, it is essential that the gateway and the smartphone are in the same network.
03/2018 · BEGA Gantenbrink-Leuchten KG · www.bega.com
EN
Français
A
B C D
E
F G
I
H
AB
CDEFGH
I
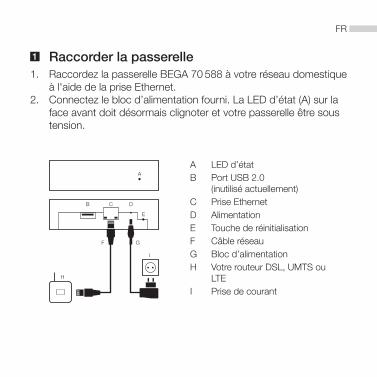
LED d’état Port USB 2.0 (inutilisé actuellement)Prise EthernetAlimentationTouche de réinitialisationCâble réseauBloc d’alimentationVotre routeur DSL, UMTS ou LTEPrise de courant
1 Raccorderlapasserelle1. Raccordez la passerelle BEGA 70 588 à votre réseau domestique
à l'aide de la prise Ethernet. 2. Connectez le bloc d’alimentation fourni. La LED d’état (A) sur la
face avant doit désormais clignoter et votre passerelle être sous tension.
FR
2 Configurerlapasserelle1. Ouvrez une fenêtre de navigateur sur votre ordinateur, smartpho-
ne ou tablette.2. Dans la ligne d’adresse, tapez l’adresse IP de la passerelle telle
qu’elle était à la livraison (http://192.168.0.211) et appuyez sur la touche Entrée.
3. Dans la fenêtre d’invite, saisissez le nom d’utilisateur admin et le mot de passe admin.
Attention : Si aucune page ne s’affiche après la saisie de l’adresse IP, il se peut que la passerelle se trouve dans un autre domaine d’adresse IP. Pour plus d’informations sur ce point, reportez-vous à la notice de mise en service de la passerelle, section « Modifier les paramètres réseau pour l’accès à la passe-relle ».
3 ConfigurationréseauVous vous trouvez à présent sur la page de démarrage de l’interface Web de la passerelle. Cliquez sur « Configuration réseau » pour adap-ter les paramètres réseau à votre réseau domestique.
FR
TCP/IP TCP/IP
BEGA GatewayBEGA App
ZigB
ee control module 030
ZigB
ee control module 031
ZigB
ee control module 031
ZigB
ee
LN
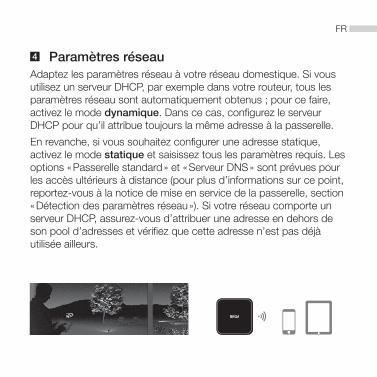
4 ParamètresréseauAdaptez les paramètres réseau à votre réseau domestique. Si vous utilisez un serveur DHCP, par exemple dans votre routeur, tous les paramètres réseau sont automatiquement obtenus ; pour ce faire, activez le mode dynamique. Dans ce cas, configurez le serveur DHCP pour qu’il attribue toujours la même adresse à la passerelle.
En revanche, si vous souhaitez configurer une adresse statique, activez le mode statique et saisissez tous les paramètres requis. Les options « Passerelle standard » et « Serveur DNS » sont prévues pour les accès ultérieurs à distance (pour plus d’informations sur ce point, reportez-vous à la notice de mise en service de la passerelle, section « Détection des paramètres réseau »). Si votre réseau comporte un serveur DHCP, assurez-vous d’attribuer une adresse en dehors de son pool d’adresses et vérifiez que cette adresse n’est pas déjà utilisée ailleurs.
FR

5 Téléchargerl’applicationBEGAGatewayTéléchargez l’application BEGA Gateway à partir de la boutique en ligne correspondante. L’application est disponible pour iOS et Android.
Attention : Si votre passerelle a été configurée sur le serveur DHCP, elle est disponible dès à présent sous une nouvelle adresse IP. Pour réaliser les étapes suivantes, vous devez vous connecter à votre passerelle sous cette adresse IP (en saisissant cette der-nière dans la ligne d’adresse conformément au paragraphe 2).Pour détecter l’adresse actuelle, lancez l’application. Pourladétection,lapasserelleetlesmartphonedoiventsetrouverdanslemêmeréseau !
6 Octroyerl’accèspourunautreappareilPour pouvoir accéder à votre passerelle depuis un smartphone ou une tablette, vous devez autoriser votre appareil de la manière suivante :
1. Cliquez sur « Sécurité ».2. Notez le code d’accès indiqué sous « Octroyer l’accès pour un
autre appareil » et cliquez sur « Activer ». Vous disposez maintenant de 5minutes pour réaliser l’étape 7.
FR
7 Activerleboîtierdecommande1. Lancez l’application BEGA Gateway sur votre smartphone ou
votre tablette.2. Le nom de votre passerelle apparaît. Si votre passerelle n’est pas
affichée, mettez à jour la vue en faisant glisser l’écran vers le bas.
3. Sélectionnez le nom de la passerelle et saisissez le code d’accès.
Vous pouvez à présent commencer la configuration de votre système.
InformationssupplémentairesUne notice d’installation et de mise en service détaillée est disponible sur le site Web à l’adresse www.bega.com.
Attention : Pour l’installation initiale, la passerelle et le smartphone doivent se trouver dans le même réseau.
03/2018 · BEGA Gantenbrink-Leuchten KG · www.bega.com
FR

03 0
0 35
76