boso medicus 1307sd
35
medicus Gebrauchs- anweisung User Instructions Mode d’emploi Manuale di istruzioni Manual del Usuario 2 33 64 95 126
Transcript of boso medicus 1307sd
medicusGebrauchs-anweisung
User Instructions
Mode d’emploi
Manuale di istruzioni
Manual del Usuario
�
�
�
�
�
2
33
64
95
126
33
�
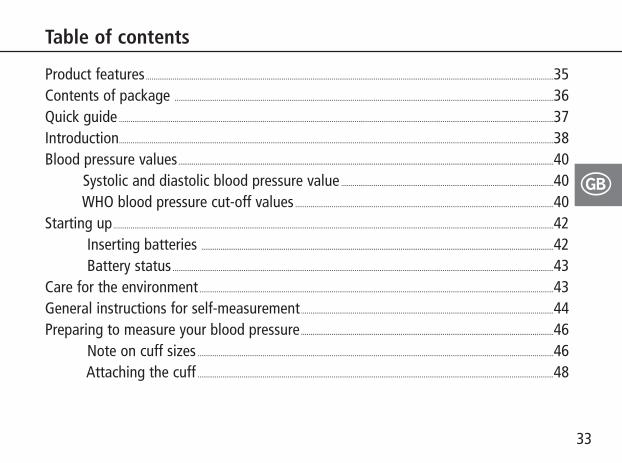
Table of contents
Product features.....................................................................................................................................................................................................................35Contents of package ......................................................................................................................................................................................................36Quick guide ...................................................................................................................................................................................................................................37Introduction...................................................................................................................................................................................................................................38Blood pressure values....................................................................................................................................................................................................40
Systolic and diastolic blood pressure value ...............................................................................................................40WHO blood pressure cut-off values .......................................................................................................................................40
Starting up......................................................................................................................................................................................................................................42Inserting batteries ........................................................................................................................................................................................42Battery status .......................................................................................................................................................................................................43
Care for the environment .........................................................................................................................................................................................43General instructions for self-measurement....................................................................................................................................44Preparing to measure your blood pressure....................................................................................................................................46
Note on cuff sizes ..........................................................................................................................................................................................46Attaching the cuff ..........................................................................................................................................................................................48

Measuring your blood pressure.......................................................................................................................................................................51Interrupting a measurement.............................................................................................................................................................52
Measurement display .....................................................................................................................................................................................................53Mains operation ...................................................................................................................................................................................................................55Error messages.........................................................................................................................................................................................................................56Cleaning and Disinfection........................................................................................................................................................................................57Warranty ........................................................................................................................................................................................................................................57Customer service / Disposal..................................................................................................................................................................................58Technical data............................................................................................................................................................................................................................59Calibration checks - Testing instructions (for trained specialist staff only) ....................................................................................................................................................................62
34
Table of contents
�
35
�
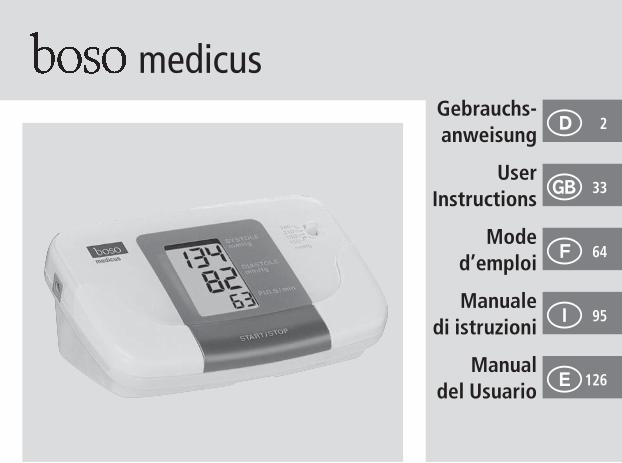
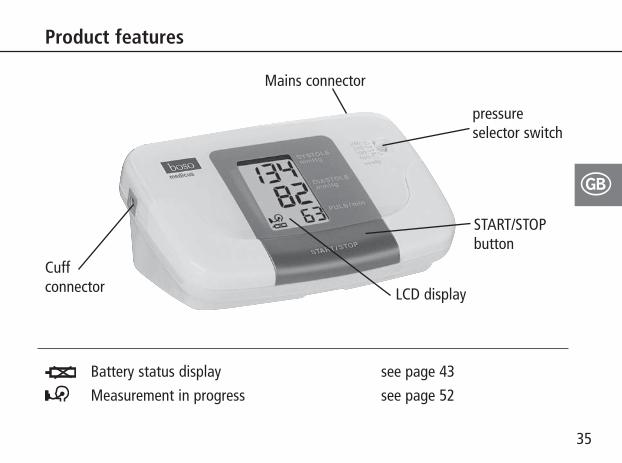
Mains connector
pressure selector switch
START/STOPbutton
LCD display
Cuff connector
Product features
Battery status display see page 43
Measurement in progress see page 52
36
�
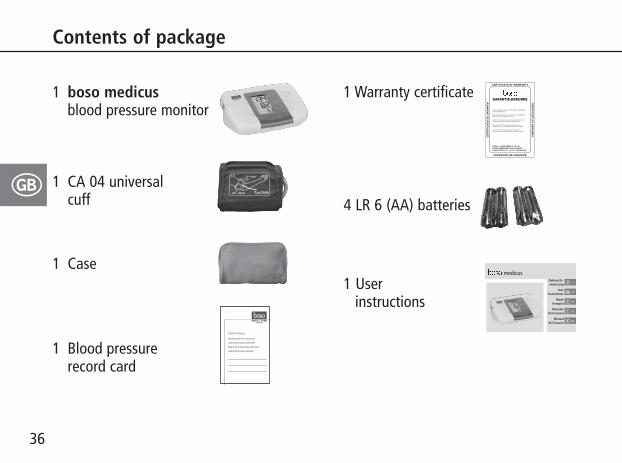
Contents of package
1 boso medicusblood pressure monitor
1 CA 04 universal cuff
1 Case
1 Blood pressure record card
BOSCH + SOHN GMBH U. CO. KGFABRIK MEDIZINISCHER APPARATEBAHNHOFSTR. 64 · D-72417 JUNGINGEN
Diese Garantie-Urkunde ist nur gültig in Verbindung mit einem Kaufbeleg.
This warranty certificate is valid only in combinationwith a proof of purchase (invoice).
Ce certificat de garantie est valable uniquement surprésentation d'une preuve d'achat (facture)
Este certificado de garantía es válido sólo en combinación con una prueba de compra (factura).
Questo certificato di garanzia è valido solo in combinazione con una prova di acquisto (fattura).
GARANTIE-URKUNDE
CERTIFICATE OF WARRANTY
CERTIFICAT DE GARANTIE
CE
RT
IFIC
AD
O D
E G
AR
AN
TIA
CE
RT
IFIC
AT
O D
I GA
RA
NZ
IA
medicusGebrauchs-anweisung
UserInstructions
Moded’emploi
Manualedi istruzioni
Manualdel Usuario
2
33
64
95
126
1 Warranty certificate
4 LR 6 (AA) batteries
1 Userinstructions
Blutdruckpass
Blood pressure record card
Carnet de tension arterielle
Diario de la pressione arteriosa
Carnet de presion arterial

37
�
Quick guide
➡ Insert batteries, ensure correct position-ing (P. 42)
➡ Connect cuff to monitor (P. 46)
➡ Attach cuff (P. 47)
➡ Start (and stop) a measurement bypressing the START/STOP button (P. 51)
Measured systolic, diastolic and pulsevalues are displayed after the measure-ment is completed (P. 53)
� This quick guide does not replace thedetailed information on the use andsafety of the blood pressure monitor fea-tured in the user instructions.
Please be sure therefore to readthe user instructions!
38
Introduction
Dear Customer,We are delighted that you have decidedto purchase a boso blood pressure mon-itor. The boso brand is synonymous withoptimal quality and precision and is alsonumber 1 among professionals: 77% ofall German doctors currently use bosoblood pressure monitors. The experiencegained from decades of use by profession-als has also been incorporated into allthe patient monitors for home measure-ment.This instrument has also passed our strictquality control procedures and is your reli-able partner for monitoring your bloodpressure values.
� Please read these user instructionsbefore using the instrument for the firsttime, as correct blood pressure readings
can only be obtained if the instrument isoperated correctly.In these user instructions, „➡“ means anaction by the user.
To get help concerning usage or mainten-ance please contact your dealer or themanufacturer (contact details can befound on the back cover of this manual).
An unexpected operating condition or anincidence which has worsened the healthcondition or could have worsened thehealth condition should be reported to themanufacturer immediately.
If the instrument is to be sold, ensure thatthese user instructions are enclosed.
�
39
�
Introduction
If the monitor is used in medical practice(in accordance with the legislation govern-ing the operation of medical devices), itshould be calibrated at regular intervals(see page 62).
The boso medicus blood pressure monitoris suitable for patients of all ages with anupper arm circumference of be-tween 22and 48 cm. The monitor is not suitable forneonatals.
Wireless communication devices, such ashome networking devices, mobile phones,cordless phones and their base stations,walkie-talkies can affect this blood pres-sure monitor. Therefore, a minimumdistance of 11 feet should be kept fromsuch devices.
40
�
Blood pressure values
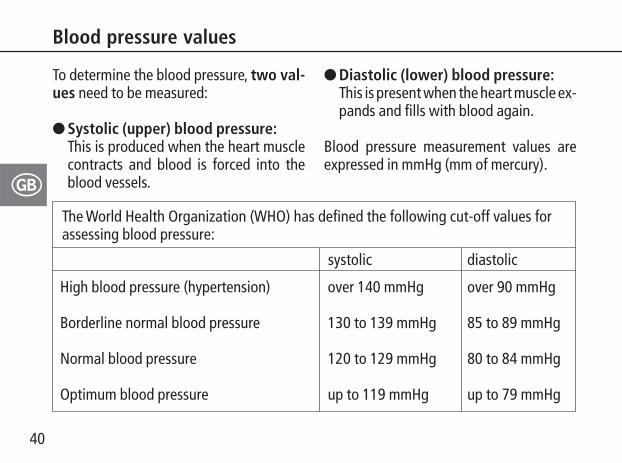
To determine the blood pressure, two val-ues need to be measured:
● Systolic (upper) blood pressure:This is produced when the heart musclecontracts and blood is forced into theblood vessels.
● Diastolic (lower) blood pressure:This is present when the heart muscle ex-pands and fills with blood again.
Blood pressure measurement values areexpressed in mmHg (mm of mercury).
systolic diastolic
High blood pressure (hypertension) over 140 mmHg over 90 mmHg
Borderline normal blood pressure 130 to 139 mmHg 85 to 89 mmHg
Normal blood pressure 120 to 129 mmHg 80 to 84 mmHg
Optimum blood pressure up to 119 mmHg up to 79 mmHg
The World Health Organization (WHO) has defined the following cut-off values for assessing blood pressure:
41
�
Blood pressure values
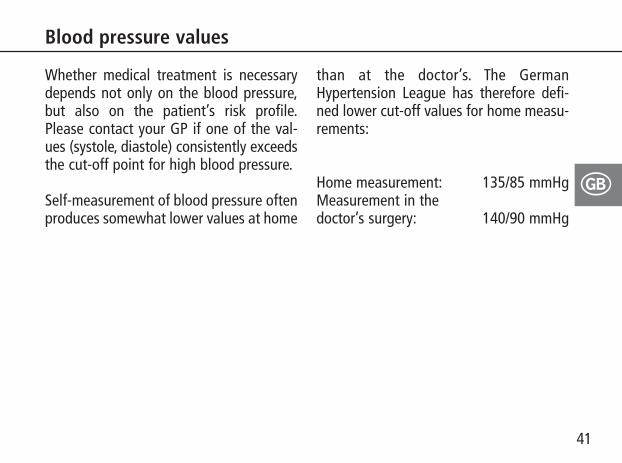
Whether medical treatment is necessarydepends not only on the blood pressure,but also on the patient’s risk profile.Please contact your GP if one of the val-ues (systole, diastole) consistently exceedsthe cut-off point for high blood pressure.
Self-measurement of blood pressure oftenproduces somewhat lower values at home
than at the doctor’s. The GermanHypertension League has therefore defi-ned lower cut-off values for home measu-rements:
Home measurement: 135/85 mmHgMeasurement in the doctor’s surgery: 140/90 mmHg
42
�
Starting up
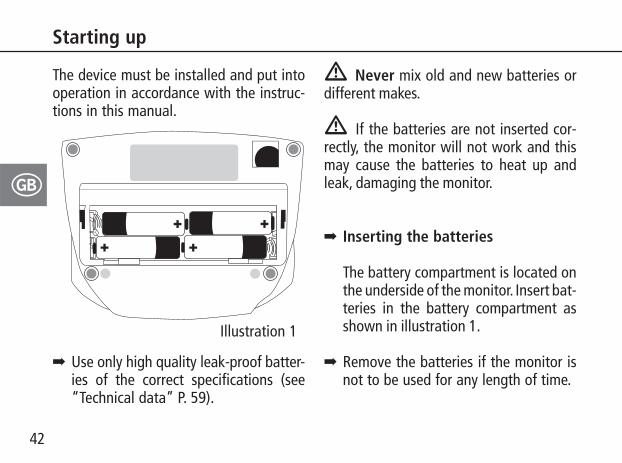
➡ Use only high quality leak-proof batter-ies of the correct specifications (see“Technical data” P. 59).
� Never mix old and new batteries ordifferent makes.
� If the batteries are not inserted cor-rectly, the monitor will not work and thismay cause the batteries to heat up andleak, damaging the monitor.
➡ Inserting the batteries
The battery compartment is located onthe underside of the monitor. Insert bat-teries in the battery compartment asshown in illustration 1.
➡ Remove the batteries if the monitor isnot to be used for any length of time.
+ ++ +
Illustration 1
The device must be installed and put intooperation in accordance with the instruc-tions in this manual.

43
�
Starting up
The monitor has a battery status display(see P. 35)
Flashing! No further measurements possible.Replace battery.
� Care for the environment
Do not dispose of used batteries andcharger units in domestic waste.You can take these to collection sites forused batteries or special waste.Contact your local authority for informa-tion.
44
�
General instructions for self-measurement
1. Fluctuations in blood pressure are quitenormal. Even when measurements arerepeated, there can be marked differ-ences. Single or irregular measure-ments do not provide reliable informa-tion about the actual blood pressure. Areliable evaluation is only possible if reg-ular measurements are taken undercomparable conditions and the measure-ment values entered in the blood pres-sure record card.
2. � Self-testing does not mean self-treatment. Do not on any accountchange the dose of medicine prescribedby your doctor of your own accord.
3. Irregular heartbeats can affect the accu-racy of the monitor or result in incorrectmeasurements.
4. Incorrect measurements can also occurin patients with a weak pulse (possiblyin patients wearing a pacemaker, for ex-ample). The blood pressure monitor it-self has no effect on the pacemaker.
5. If you are pregnant, consult your doctorbefore using the monitor.
6. Always take the measurement in a calmand relaxed state.You are recommended to check yourblood pressure twice a day – in the morn-ing on getting up and in the eveningonce you have relaxed after work.
7. Always measure your blood pressurefrom the arm with the higher bloodpressure values (where not required otherwise (see page 49)).
45
�
General instructions for self-measurement
To do this, measure the blood pressurefirst in both arms and thereafter alwaysfrom the arm with the higher bloodpressure.
46
�
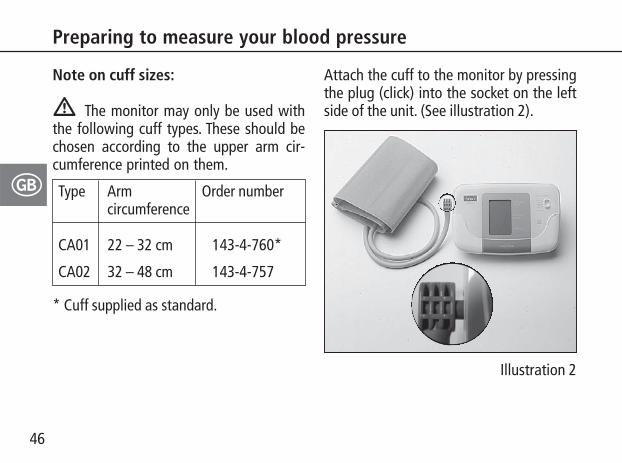
Note on cuff sizes:
� The monitor may only be used withthe following cuff types. These should bechosen according to the upper arm cir-cumference printed on them.
* Cuff supplied as standard.
Type Arm Order numbercircumference
CA01 22 – 32 cm 143-4-760*
CA02 32 – 48 cm 143-4-757
Preparing to measure your blood pressure
Attach the cuff to the monitor by pressingthe plug (click) into the socket on the leftside of the unit. (See illustration 2).
Illustration 2
47
�
Preparing to measure your blood pressure
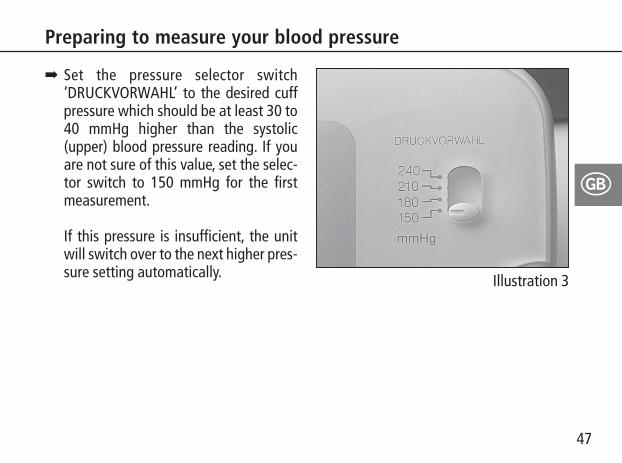
➡ Set the pressure selector switch‘DRUCKVORWAHL’ to the desired cuffpressure which should be at least 30 to40 mmHg higher than the systolic(upper) blood pressure reading. If youare not sure of this value, set the selec-tor switch to 150 mmHg for the firstmeasurement.
If this pressure is insufficient, the unitwill switch over to the next higher pres-sure setting automatically. Illustration 3

48
�
Preparing to measure your blood pressure
Observe the following instructionswhen measuring your blood pressure:
Avoid smoking or drinking coffeefor one hour before measuringyour blood pressure.
Sit comfortably for the blood pres-sure measurement. Support yourback and arms. Do not cross yourlegs. Place your feet flat on thefloor.Relax for 5 minutes before takinga measurement.Do not move during the measure-ment.
Attaching the cuff
The measurement should be taken fromthe bare upper arm.
� In the case of tightly fitting outer clothing, ensure that the blood supply tothe arm is not cut off when the sleeve isrolled up (if necessary remove the article ofclothing before taking the measurement).
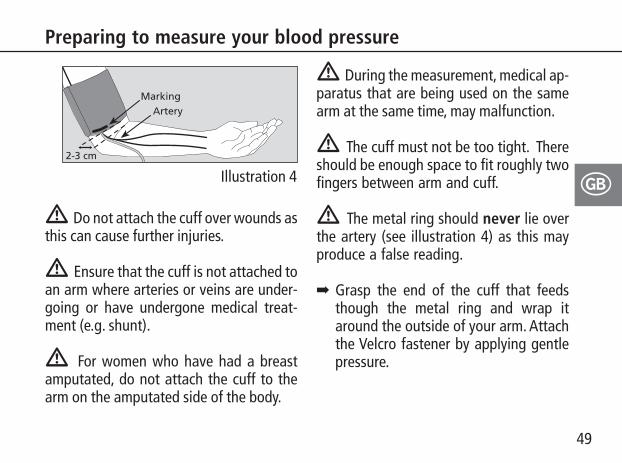
➡ Open out the cuff into the shape of aring and slide it over the upper armuntil the bottom edge of the cuff isabout 2-3 cm above the elbow. Thecuff must be positioned so that themarking is over the artery (see illustra-tion 3).
49
�
Preparing to measure your blood pressure
� Do not attach the cuff over wounds asthis can cause further injuries.
� Ensure that the cuff is not attached toan arm where arteries or veins are under-going or have undergone medical treat-ment (e.g. shunt).
� For women who have had a breastamputated, do not attach the cuff to thearm on the amputated side of the body.
� During the measurement, medical ap-paratus that are being used on the samearm at the same time, may malfunction.
� The cuff must not be too tight. Thereshould be enough space to fit roughly twofingers between arm and cuff.
� The metal ring should never lie overthe artery (see illustration 4) as this mayproduce a false reading.
➡ Grasp the end of the cuff that feedsthough the metal ring and wrap itaround the outside of your arm. Attachthe Velcro fastener by applying gentlepressure.
2-3 cm
MarkingArtery
Illustration 4

50
�
Preparing to measure your blood pressure
➡ Place your arm with the cuff attachedon the table, holding it relaxed andslightly bent so that the cuff is levelwith your heart.
Do not talk during the measure-ment.
correct values
too low values
too high values
Illustration 6
� Check that the air tube is not kinkedduring the measurement. This could causecongestion of the blood flow and sub-sequent injury.
� The blood pressure measurementshould not prevent the flow of blood for anunnecessary length of time (> 2 minutes).If the monitor fails to function correctly, re-move the cuff from the arm.
� Excessive frequent measurements cancause injury by restricting blood flow.
51
�
Measuring your blood pressure
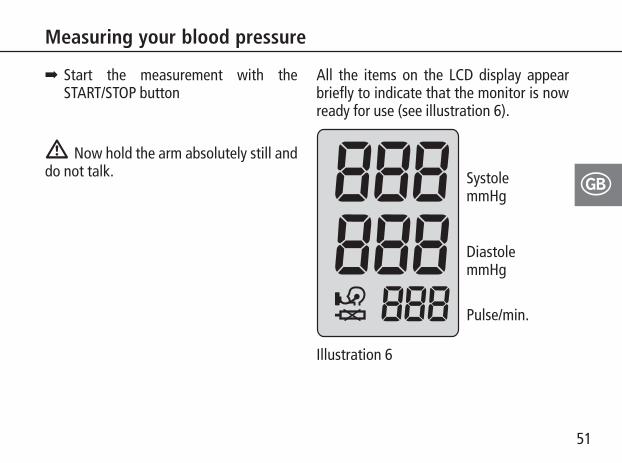
➡ Start the measurement with theSTART/STOP button
� Now hold the arm absolutely still anddo not talk.
All the items on the LCD display appearbriefly to indicate that the monitor is nowready for use (see illustration 6).
Illustration 6
Systole mmHg
Diastole mmHg
Pulse/min.
52
�
Measuring your blood pressure
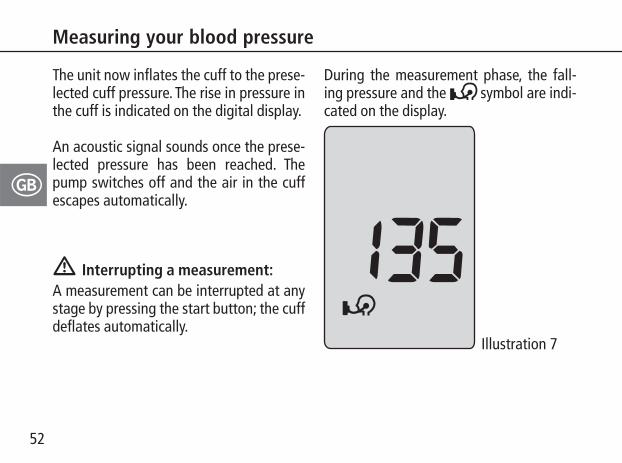
The unit now inflates the cuff to the prese-lected cuff pressure. The rise in pressure inthe cuff is indicated on the digital display.
An acoustic signal sounds once the prese-lected pressure has been reached. Thepump switches off and the air in the cuffescapes automatically.
� Interrupting a measurement:A measurement can be interrupted at anystage by pressing the start button; the cuffdeflates automatically.
During the measurement phase, the fall-ing pressure and the symbol are indi-cated on the display.
Illustration 7
53
�
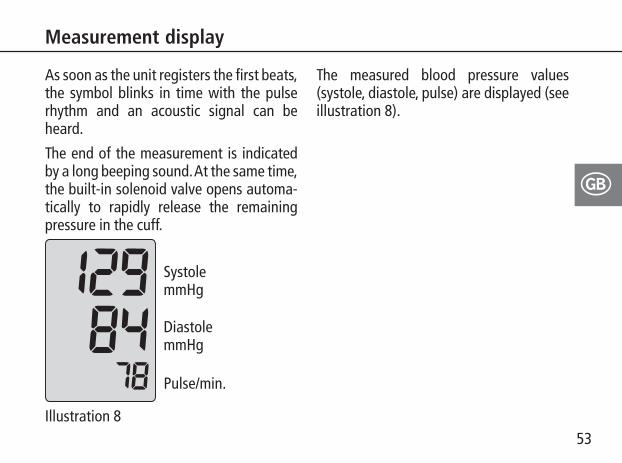
The measured blood pressure values(systole, diastole, pulse) are displayed (seeillustration 8).
Measurement display
As soon as the unit registers the first beats,the symbol blinks in time with the pulserhythm and an acoustic signal can beheard.
The end of the measurement is indicatedby a long beeping sound.At the same time,the built-in solenoid valve opens automa-tically to rapidly release the remainingpressure in the cuff.
SystolemmHg
DiastolemmHg
Pulse/min.
Illustration 8

54
�
Measurement display
Blood pressure is a dynamic parameter andcan be affected by the patient’s position,e.g. sitting, standing, lying, moving, beforeor during the measurement, physical con-dition (stress, disease, etc.).
➡ If the measurement result is obviouslywrong, repeat the measurement.
The unit switches itself to time displaymode automatically after about 1 min. Torepeat a measurement, press theSTART/STOP button again briefly.
Allow at least two minutes be-tween measurements.
➡ If no further measurement is required,remove the cuff from the arm.
➡ Enter each individual value in yourrecord card.
2min
55
�
Mains operation
The mains connection socket is located atthe rear of the monitor.Where required, use only the boso powersupply unit (order number 410-7-150).This power supply unit produces a rectifiedoutput of the correct polarity. Other com-mercially available power supply units cancause damage to the electronic compo-nents, which will invalidate the warranty.There is also a risk of fire with these otherpower supply units.
56
�
Error messages
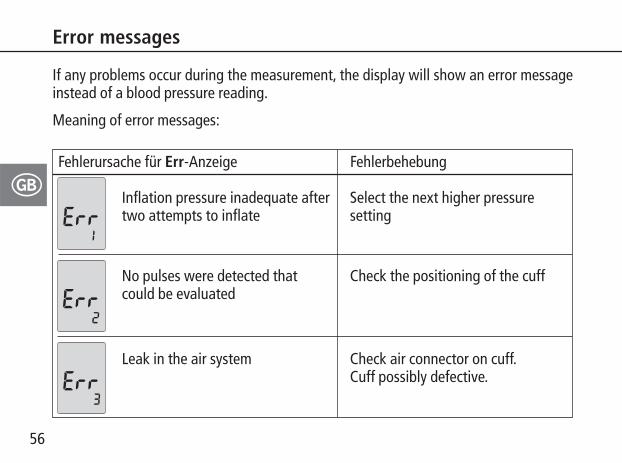
If any problems occur during the measurement, the display will show an error messageinstead of a blood pressure reading.
Meaning of error messages:
Fehlerbehebung
Inflation pressure inadequate after Select the next higher pressure two attempts to inflate setting
No pulses were detected that Check the positioning of the cuffcould be evaluated
Leak in the air system Check air connector on cuff.Cuff possibly defective.
Fehlerursache für Err-Anzeige
57
�
Cleaning and Disinfection Warranty
Cleaning Monitor:Use a soft, dry cloth to clean your monitor.
Cleaning Cuff:Small stains on the cuff can be removedcarefully with a proprietary washing-upliquid.
Disinfection Cuff:For disinfectant wipes (at least 5 minutesexposure time) of the device and the cuff,we recommend the disinfectant mikrozidsensitive liquid (Schülke & Mayr).To disinfect the velcro of the cuff, we re-commend spray disinfection.In particular, if the device is used on multi-ple users is to pay attention to regularcleaning and disinfections of the cuff.
Warranty:For details of the warranty conditions,please consult the warranty certificatesupplied.A claim under the warranty will only beaccepted if the warranty certificate,completed and stamped by the dealer, isreturned with the monitor.
58
�
Disposal
Do not dispose of monitors and bat-teries in the domestic waste.
At the end of its lifespan, the monitor mustbe taken to a collection site for obsoleteelectronic items.
Please note that batteries and recharge-able batteries must be disposed of separ-ately (local authority collection site).
Expected operational lifetime of the equip-ment: 10 years.
Expected operational lifetime of the cuff:10.000 measurement cycles.
Customer service
Customer service:Warranty and repair work must be under-taken by trained and authorised personnel.Do not modify this equipment without aut-horization of the manufacturer.Send the monitor, carefully packaged andwith sufficient postage, to your authoriseddealer or directly to:
BOSCH + SOHN GmbH u. Co. KG ServiceabteilungBahnhofstraße 64, D-72417 JungingenT: +49 (0) 74 77 / 92 75-0
59
�
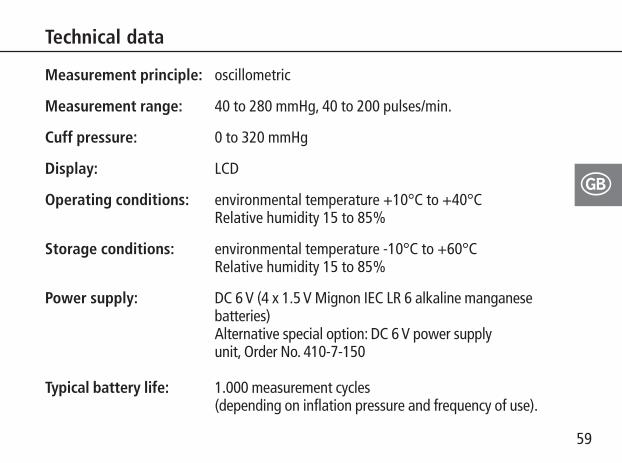
Measurement principle: oscillometric
Measurement range: 40 to 280 mmHg, 40 to 200 pulses/min.
Cuff pressure: 0 to 320 mmHg
Display: LCD
Operating conditions: environmental temperature +10°C to +40°CRelative humidity 15 to 85%
Storage conditions: environmental temperature -10°C to +60°CRelative humidity 15 to 85%
Power supply: DC 6 V (4 x 1.5 V Mignon IEC LR 6 alkaline manganese batteries) Alternative special option: DC 6 V power supplyunit, Order No. 410-7-150
Typical battery life: 1.000 measurement cycles (depending on inflation pressure and frequency of use).
Technical data
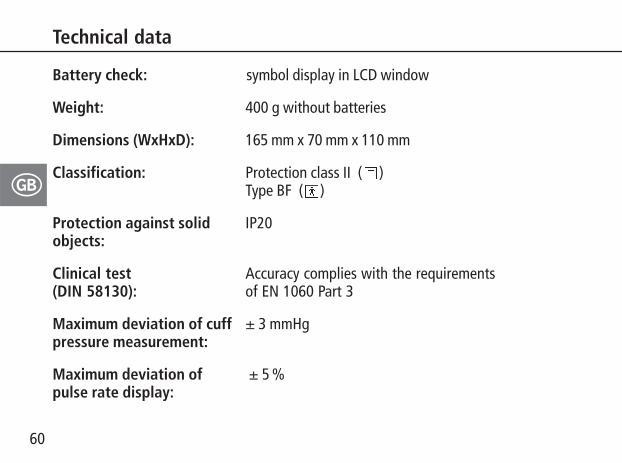
Battery check: symbol display in LCD window
Weight: 400 g without batteries
Dimensions (WxHxD): 165 mm x 70 mm x 110 mm
Classification: Protection class II ( )Type BF ( )
Protection against solid IP20objects:
Clinical test Accuracy complies with the requirements (DIN 58130): of EN 1060 Part 3
Maximum deviation of cuff ± 3 mmHgpressure measurement:
Maximum deviation of ± 5 %pulse rate display:
60
�
Technical data
61
�
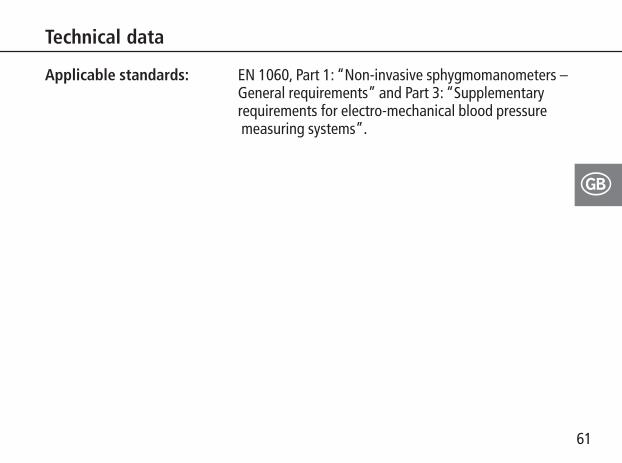
Applicable standards: EN 1060, Part 1: “Non-invasive sphygmomanometers – General requirements” and Part 3: “Supplementary requirements for electro-mechanical blood pressuremeasuring systems”.
Technical data
62
�
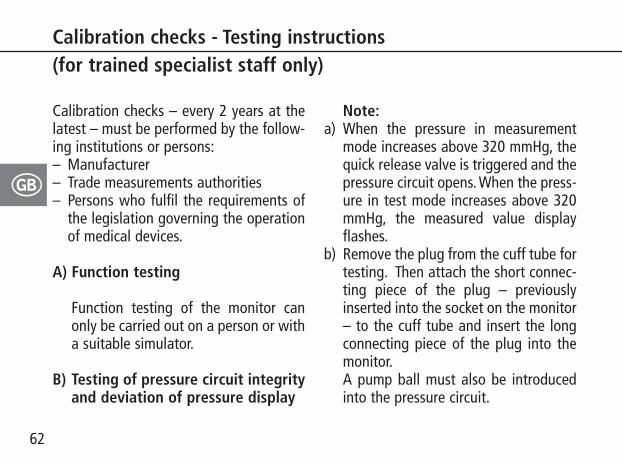
Calibration checks – every 2 years at thelatest – must be performed by the follow-ing institutions or persons:– Manufacturer– Trade measurements authorities– Persons who fulfil the requirements of
the legislation governing the operationof medical devices.
A) Function testing
Function testing of the monitor canonly be carried out on a person or witha suitable simulator.
B) Testing of pressure circuit integrityand deviation of pressure display
Calibration checks - Testing instructions (for trained specialist staff only)
Note:a) When the pressure in measurement
mode increases above 320 mmHg, thequick release valve is triggered and thepressure circuit opens. When the press-ure in test mode increases above 320mmHg, the measured value displayflashes.
b) Remove the plug from the cuff tube fortesting. Then attach the short connec-ting piece of the plug – previouslyinserted into the socket on the monitor– to the cuff tube and insert the longconnecting piece of the plug into themonitor.A pump ball must also be introducedinto the pressure circuit.
63
�
Calibration checks - Testing instructions (for trained specialist staff only)
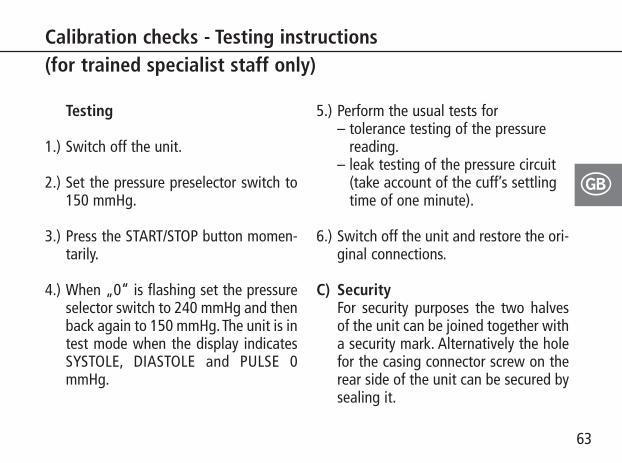
Testing
1.) Switch off the unit.
2.) Set the pressure preselector switch to150 mmHg.
3.) Press the START/STOP button momen-tarily.
4.) When „0“ is flashing set the pressureselector switch to 240 mmHg and thenback again to 150 mmHg.The unit is intest mode when the display indicatesSYSTOLE, DIASTOLE and PULSE 0mmHg.
5.) Perform the usual tests for– tolerance testing of the pressure – reading.– leak testing of the pressure circuit– (take account of the cuff’s settling– time of one minute).
6.) Switch off the unit and restore the ori-ginal connections.
C) SecurityFor security purposes the two halvesof the unit can be joined together witha security mark. Alternatively the holefor the casing connector screw on therear side of the unit can be secured bysealing it.


BOSCH + SOHN GmbH u. Co. KGBahnhofstraße 64 D-72417 Jungingen
T + 49 (0) 74 77 92 75-0F + 49 (0) 74 77 10 21E [email protected]
Internet: www.boso.de 07/2
013
0124